

Fudgy Gluten-Free Brownies (That Actually Taste Better Than Regular)
✨ Why You'll Love This RecipeHey friend — Claire here! If you’ve tried your fair share of gluten-free brownie recipes and ended up with crumbly disappointment or overly cakey sadness, stop right here. These brownies are everything you miss and more: deep cocoa flavor, shiny crackly top, fudgy center, and chewy edges. Plus, they’re naturally gluten-free and can be made totally dairy-free if needed.And trust me — nobody will know they're gluten-free.
Equipment
- 1 Bob’s Red Mill 1-to-1 https://amzn.to/4ey6Gkl
Ingredients
Dry:
- ½ cup gluten-free all-purpose flour (with xanthan gum — I use Bob’s Red Mill 1-to-1)
- ⅓ cup unsweetened cocoa powder
- ¼ tsp salt
Wet:
- ½ cup unsalted butter, melted (or refined coconut oil for dairy-free)
- 1 cup granulated sugar (or ¾ cup coconut sugar for a more wholesome version)
- 2 large eggs
- 1 tsp vanilla extract
- Optional: ½ tsp espresso powder (enhances the chocolate without tasting like coffee — highly recommend)
Add-Ins:
- ½ cup chocolate chips or chopped chocolate
- Optional: ½ cup chopped walnuts or pecans
Instructions
1. Preheat & Prepare
- Set your oven to 350°F (175°C). Grease or line an 8x8-inch baking pan with parchment paper. Let a bit of it hang over the sides — makes lifting the brownies out way easier later. (Claire’s Lazy Tip: parchment = less cleanup.)
2. Mix the Wet Ingredients
- In a medium bowl, whisk together your melted butter (or coconut oil), sugar, and vanilla until glossy and combined — about 1 minute.
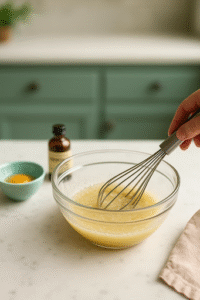
- Add the eggs, one at a time, whisking well after each. You want the mixture to look thick, smooth, and pale. This is key for that classic crackly brownie top — yes, we’re doing it right.Claire’s Real-Talk: Whisk like you mean it — 2 full minutes with a hand whisk builds that shiny top everyone wants in a fudgy gluten-free brownie.
3. Add the Dry Ingredients
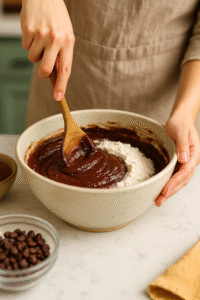
- Sift in your gluten-free flour, cocoa powder, salt, and espresso powder (if using). Switch to a spatula and fold gently. Don’t overmix — just until no dry streaks remain. If using chocolate chips or nuts, fold them in last.
4. Bake to Fudgy Perfection
- Pour the thick batter into your prepared pan and smooth the top.
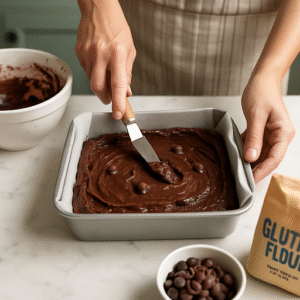
- Bake for 25–28 minutes, until the edges are set and a toothpick inserted about 2 inches from the edge comes out with moist crumbs. If you test the very center, it should be slightly underdone — that’s how we keep them fudgy after cooling.Claire’s Soft Center Tip: Take them out a little sooner if you like molten middles. Don’t worry — they’ll finish setting as they cool.
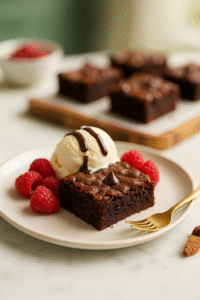
5. Cool & Slice Like a Pro
- Let them cool completely in the pan — I know, it’s hard, but worth it. Use the parchment to lift them out. For perfect squares, chill in the fridge for 15 minutes before slicing. Use a sharp knife and wipe it between cuts for clean edges.
Notes
Substitutions & Add-Ons
- Dairy-Free: Use coconut oil or vegan butter + dairy-free chocolate chips
- Egg-Free: Try 2 flax eggs (2 tbsp ground flax + 6 tbsp water)
- Lower Sugar: Use coconut sugar and dark chocolate chips
- Texture Add-In: Swirl in peanut butter or almond butter before baking
Related Recipes
Craving cookies too? Try these Soft-Baked Gluten-Free Chocolate Chip CookiesLooking for something lighter? You’ll love this Gluten-Free Lemon Loaf
