Blog

Your blog category

Blog

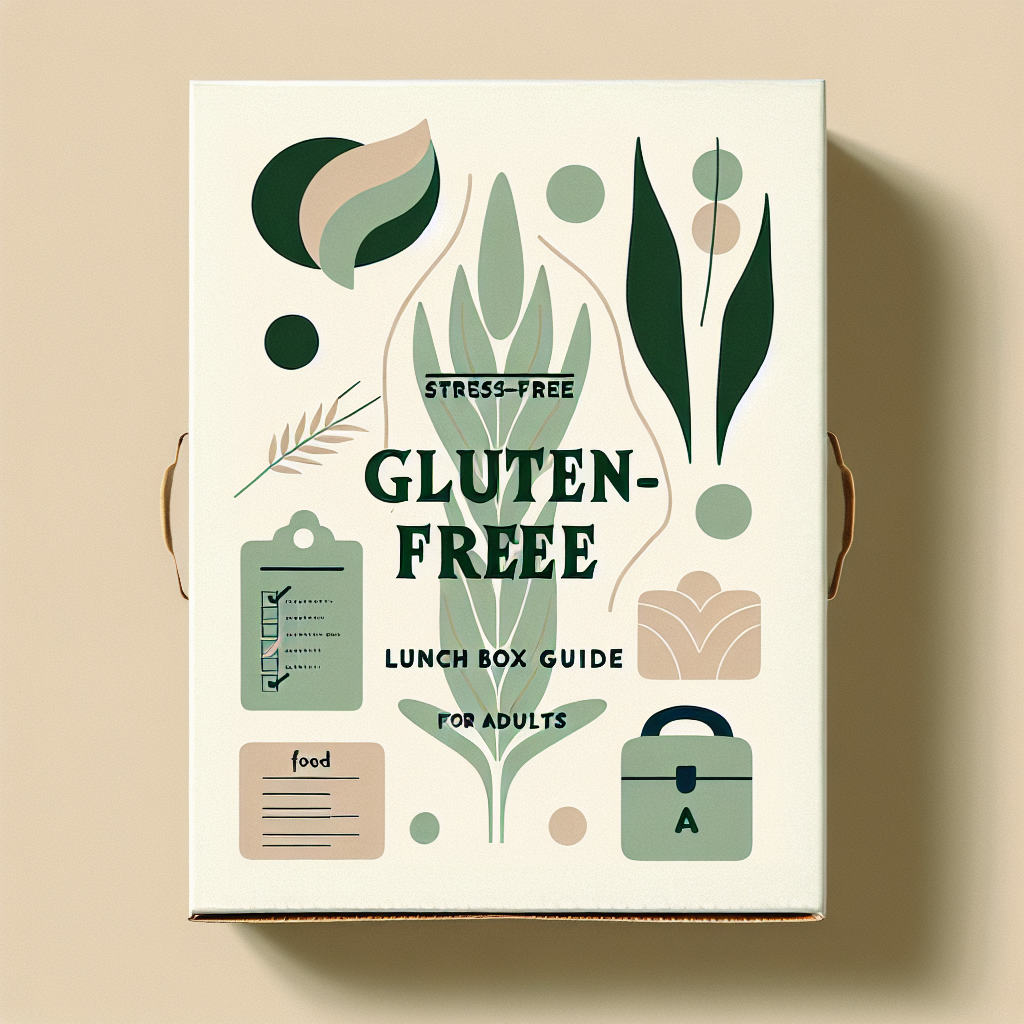
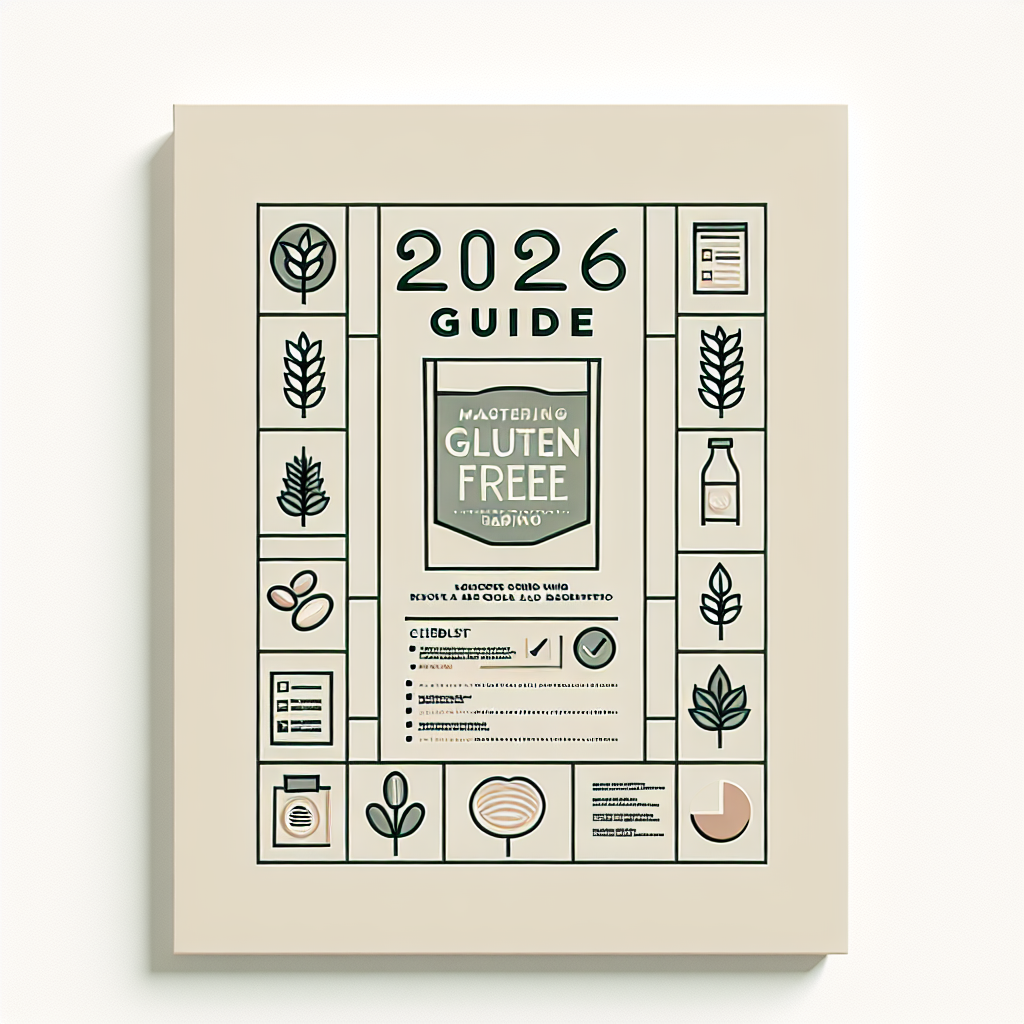
2026 Guide: Mastering Gluten-Free Label Reading

2026 Guide Download Your Free Guide to Confident Gluten-Free Label Reading The Beginner’s Guide to Gluten-Free Label Reading (So You Actually Enjoy Shopping Again) Gluten hides in the most unexpected places—soy sauce, “healthy” granola, even your favorite spice blends. Learning to read labels confidently is the difference between constant second-guessing and feeling calm, prepared, and actually excited to try new products. This guide walks you through the essentials of spotting gluten on labels, decoding sneaky ingredients, and building a shopping routine that feels simple, not stressful. Download Our Free Gluten-Free Starter Guide 7-day meal plan shopping list Tips & 3 beginner-friendly recipes download now Introduction If you’ve ever stood in the grocery aisle, staring at a label and wondering, “Okay, but is this actually gluten-free?”—you’re not alone. Every ingredient list feels like a pop quiz, and the stakes are high when your health and comfort are on the line. The good news: label reading is a skill you can absolutely learn, and once you do, shopping becomes far less overwhelming. In this guide, we’ll break down exactly how to spot gluten on food labels, what common phrases really mean, and how to handle gray areas like “may contain wheat” or “processed in a facility with…” You’ll also learn how to choose gluten-free products more confidently at home, on the road, and when you’re eating out or ordering in. Think of this as your friendly, practical roadmap to gluten-free label reading—no fear-mongering, no jargon, just clear information and real-world tips you can start using on your next grocery trip. Table of Contents ▾ 1. Why Gluten-Free Label Reading Matters (And What “Gluten-Free” Legally Means) 2. How to Spot Gluten on Labels: Ingredients, Allergens, and Sneaky Sources 3. Decoding Common Certifications, Claims, and “May Contain” Statements 4. Smart Shopping Strategies for a Stress-Free Gluten-Free Grocery Trip 5. Building Long-Term Confidence with Practice, Tools, and Simple Systems 1. Why Gluten-Free Label Reading Matters (And What “Gluten-Free” Legally Means) Before we dive into the nitty-gritty of labels, it helps to understand what “gluten-free” actually means from a regulatory standpoint—and why that matters for your daily choices. What gluten is (in label-reading terms) Gluten is the family of proteins found in: Wheat (including spelt, durum, semolina, farro, and more) Barley (often hiding in malt and flavorings) Rye Crossbreeds like triticale (wheat × rye) In practice, gluten can show up directly as these grains, or indirectly through ingredients that are derived from them. That’s why label reading is more than just scanning for the word “wheat.” What “gluten-free” means on packaged foods In many countries, including the United States, “gluten-free” on a food label is a regulated term. Manufacturers using it must meet specific standards, typically: Ingredients that are naturally gluten-free, or Ingredients processed to remove gluten, and A final product tested to contain less than a specific, low amount of gluten (commonly 20 parts per million). This doesn’t guarantee the food is suitable for every individual, but it provides an important baseline of safety and consistency. When you see a regulated “gluten-free” claim, the brand is responsible for following and documenting those standards. Why label reading still matters—even with “gluten-free” claims So if a product says “gluten-free,” why not just toss it into the cart and move on? Because label reading helps you: Catch recipe changes. Manufacturers can change ingredients at any time. Reading labels helps you notice when a trusted product adds a gluten-containing ingredient or removes a gluten-free claim. Spot personal triggers. Many people also avoid dairy, soy, or other ingredients. Label reading gives you the full picture so you can choose what works for your body and lifestyle. Be smarter in higher-risk categories. Things like sauces, soups, and processed meats are more likely to contain hidden gluten. Labels help you navigate those landmines. The mindset shift: from “fearful detective” to “confident investigator” At first, reading labels can feel like you’re searching for danger in every package. With practice, it becomes more like a quick checklist. The mindset shift looks like this: Early days: “I have no idea what any of this means. I’m going to be here forever.” With practice: “Glance at bolded allergens, scan ingredient list, double-check anything vague—done.” This guide is designed to help you reach that second stage faster, so the grocery store becomes manageable again—not a maze of maybes. Need Help Staying Organized? Plan meals & shopping Stay on track with ease See Planner 2. How to Spot Gluten on Labels: Ingredients, Allergens, and Sneaky Sources Now let’s get practical. When you pick up a package, there are three key places to look: The allergen statement (often in bold under the ingredient list) The full ingredient list itself Any front-of-pack claims or certifications Step 1: Check the allergen statement for wheat Many countries require that common allergens—including wheat—be clearly identified. You’ll usually see this in one of two formats: “Contains: wheat, milk, soy.” Or wheat highlighted in the ingredients list itself (often in bold). If you are avoiding gluten, any product that clearly “contains wheat” is a no-go unless it is specifically labeled and certified as gluten-free due to special processing. For most beginners, it’s simpler just to avoid anything that lists wheat in the allergen line. Step 2: Scan the ingredient list for gluten-containing grains Next, move to the ingredient list. Here’s what you’re watching for: Wheat (including spelt, farro, kamut, durum, semolina, bulgur) Barley (often in the form of barley malt, malt extract, malt flavoring) Rye Triticale (a wheat–rye hybrid) Some foods are obvious, like wheat flour in bread or barley in beer. Others are more subtle, like barley malt in breakfast cereals or flavorings. Step 3: Learn the common “watch list” ingredients There are certain ingredients that are not automatically gluten-containing, but are worth a closer look because they may be derived from gluten grains, depending on how they’re made. Examples include: Malt, malt extract, malt flavoring (often barley-derived) Modified food starch (in some regions, wheat-based starch must be labeled as wheat) Flavorings (especially

Blog

“The Ultimate Guide to Gluten-Free Baking: Flour Basics, Recipes, and Tips”

2026 Guide Download the Ultimate Gluten-Free Flour & Baking Guide (So Your Bakes Actually Work) Gluten-Free Flour 101: How to Choose, Use & Substitute Flours for Foolproof Baking Gluten-free baking doesn’t have to be hit-or-miss. Once you understand how different gluten-free flours behave—and when to use a trusted 1:1 blend—you can turn out pancakes, cookies, and quick breads that taste just as good as the gluten-filled versions. This guide walks you through gluten-free flour basics, smart substitutions, and practical tips so your next bake is a win, not a “learned a lesson.” Download Our Free Gluten-Free Starter Guide 7-day meal plan shopping list Tips & 3 beginner-friendly recipes download now Introduction Switching to gluten-free baking is a bit like switching to a new language: the alphabet looks familiar, but the grammar is totally different. The “grammar” of gluten-free baking is flour—what you choose, how much you use, and what you pair it with. When you get that right, everything else becomes easier: brownies are fudgy, muffins rise, and pancakes don’t fall apart on the griddle. The confusing part? There isn’t just one gluten-free flour. There are dozens: rice, sorghum, almond, coconut, tapioca, potato, buckwheat, corn, and then the flour blends. Some are light and starchy, some are hearty and whole-grain, some soak up a ton of liquid, and some barely absorb any at all. Treat them all the same, and you end up with gummy bread one day and crumbly cookies the next. This guide is your friendly roadmap through that chaos. You’ll learn the core types of gluten-free flours, when it makes sense to rely on a reliable 1:1 blend, how to substitute flours without tanking a recipe, and how to troubleshoot the most common problems. Whether you’re brand-new to gluten-free or just tired of baking “experiments,” you’ll walk away with clear, practical steps you can use in your very next recipe. Table of Contents ▾ 1. Understanding Gluten-Free Flours: The Basics 2. When to Use a 1:1 Gluten-Free Flour Blend 3. How to Substitute Gluten-Free Flours Without Ruining the Recipe 4. Gluten-Free Baking Tips for Better Texture & Flavor 5. Simple Gluten-Free Baking FAQ for Everyday Cooks 1. Understanding Gluten-Free Flours: The Basics Gluten is the protein in wheat, barley, and rye that gives dough its stretch and bakes its structure. Once you remove it, you’re essentially asking a pile of ground grains and starches to act like a bouncy, elastic dough—without any help. That’s why gluten-free baking often calls for a blend of flours and starches rather than relying on just one. To make sense of the options, it helps to group gluten-free flours into three main categories, each with a specific job in your baking: 1.1 Whole-Grain Gluten-Free Flours These flours bring flavor, color, and nutrition to your baking. They also tend to add structure and a heartier crumb. Brown rice flour – Mild, versatile, and common in blends. Good for cookies, cakes, and breads when paired with starches. Sorghum flour – Soft, slightly sweet, and similar to wheat in flavor. Works well in muffins, quick breads, and pancakes. Oat flour (certified gluten-free) – Buttery, comforting flavor. Great in cookies, bars, and snack cakes. Always look for certified gluten-free if you’re sensitive. Buckwheat flour – Earthy and robust. Lovely in pancakes, waffles, and rustic breads when not used as the only flour. Whole-grain flours are the “body” of your blend. Use too much, and bakes can feel heavy. Use too little, and you may end up with something pale and bland. 1.2 Starches and Light Flours Starches help mimic the lightness and chew that gluten usually gives. They’re rarely used alone but are essential in most gluten-free blends. Tapioca starch – Adds chew, elasticity, and a nice golden color. Great in breads, pizza crust, and chewy cookies. Potato starch – Adds tenderness and helps keep baked goods moist. Cornstarch – Lightens texture and is often used in cakes and cookies. White rice flour – Technically a flour, but behaves very much like a starch. Useful for lightening blends but can be gritty in large amounts. The role of starches is to balance out whole-grain flours. They help your recipes feel less dense and more bakery-style. 1.3 Nut & Specialty Flours These are powerful “character” flours. A little goes a long way, and they can easily dominate a recipe if overused. Almond flour – Moist, rich, and slightly sweet. Popular in cookies, shortbread, and grain-free cakes. Coconut flour – Extremely absorbent. Requires extra eggs and liquid. Best in recipes specifically developed for it. Chickpea/garbanzo flour – High in protein, slightly nutty, sometimes “bean-y.” Great in flatbreads and savory bakes. Because these flours behave very differently from grain flours, you don’t usually swap them in 1:1. Instead, look for recipes designed to use them—or pair a small amount with a reliable all-purpose gluten-free blend. 1.4 Why Blends Work Better Than Single Flours Most traditional recipes were developed for wheat flour, which brings structure, stretch, and tenderness all in one ingredient. No single gluten-free flour can do that job alone. Blends work because they combine: A whole-grain flour for flavor and structure One or more starches for lightness and tenderness Sometimes a binder like xanthan gum or guar gum to help everything hold together You can absolutely mix your own blends if you enjoy experimenting, but for everyday baking—especially when you just want pancakes on the table—a pre-mixed gluten-free 1:1 flour is usually the least stressful option. Need Help Staying Organized? Plan meals & shopping Stay on track with ease See Planner 2. When to Use a 1:1 Gluten-Free Flour Blend Gluten-free flour blends that are labeled “1:1” or “measure for measure” are designed to replace wheat all-purpose flour in recipes, cup for cup. For busy home bakers, they’re the closest thing to a shortcut you’ll find. You don’t have to pull out five bags of flour, measure ratios, or worry about whether you got the starch balance right—the blend is already tested. The key is knowing when

Blog

Ultimate Gluten-Free Brunch Hosting Guide

2026 Guide Download the Ultimate Gluten-Free Hosting Playbook Gluten-Free Brunch Hosting: Easy Ideas, Safe Menus & Stress-Free Prep Hosting a gluten-free brunch doesn’t have to mean complicated recipes or apologizing for “being difficult.” With a bit of planning, the right ingredients, and a few smart shortcuts, you can lay out a gorgeous spread that’s naturally gluten-free, safe for sensitive guests, and so delicious that nobody misses the gluten. This guide walks you through menu ideas, cross-contact tips, prep timelines, and effortless ways to make your table feel special—not stressful. Download Our Free Gluten-Free Starter Guide 7-day meal plan shopping list Tips & 3 beginner-friendly recipes download now Introduction If you’ve ever tried to host brunch for gluten-free friends (or you’re the gluten-free one hoping not to eat just fruit and coffee), you know it can feel intimidating. Classic brunch menus are full of bread, pastries, and cross-contact landmines. But when you flip the script and build the menu around simple, naturally gluten-free dishes, brunch suddenly becomes one of the easiest meals to host. This article will walk you through how to create a stress-free gluten-free brunch from start to finish: planning your menu, shopping without second-guessing every label, prepping ahead so you’re not stuck in the kitchen, and serving everything in a way that feels both safe and a little bit special. Think frittatas, roasted potatoes, yogurt parfait bars, and bright salads—plus ideas for baked treats that actually taste like brunch, not “compromise.” Whether you’re throwing a baby shower, holiday get-together, or casual Sunday hangout, you’ll find practical, evergreen tips you can reuse over and over. Use this as your go-to brunch blueprint, and then customize the details based on the season, your guests, and how much time and energy you realistically have that week. Table of Contents ▾ 1. Planning a Gluten-Free Brunch That Actually Feels Easy 2. Safe Gluten-Free Brunch Menu Ideas & Smart Storage 3. Prep Timeline: What to Make Ahead (and What to Skip) 4. Avoiding Cross-Contact in a Shared Kitchen 5. Hosting Confidently: Communication, Shortcuts & Leftovers 1. Planning a Gluten-Free Brunch That Actually Feels Easy The secret to a smooth gluten-free brunch is to build your menu around dishes that are naturally gluten-free, require minimal last-minute cooking, and can be served family-style. That way you’re not juggling separate “special” food for gluten-free guests; the whole spread works for everyone. Start with a simple framework Instead of starting with specific recipes, think in categories. A balanced brunch typically includes: One egg-based main – frittata, crustless quiche, or shakshuka. One hearty side – roasted potatoes, hash, or breakfast sausage (verified gluten-free). One fresh element – fruit salad, citrus platter, or simple green salad. One “treat” – muffins, coffee cake, or pancakes made with trusted gluten-free ingredients. One beverage station – coffee, tea, water, plus an optional mimosa or juice bar. This structure keeps your menu focused and makes planning your shopping list much easier. You can repeat this framework for holidays, birthdays, or casual weekends and just rotate flavors with the seasons. Choose naturally gluten-free stars Eggs, vegetables, potatoes, fruit, dairy, legumes, and most meats are naturally gluten-free when they’re not seasoned or processed with gluten-containing ingredients. Building your menu around these basics means fewer specialty products to buy and fewer labels to stress over. For example, instead of a traditional quiche with a wheat crust, try a veggie-packed crustless quiche baked in a pie dish. Swap regular toast and bagels for: Roasted breakfast potatoes with herbs A quinoa or rice salad with fresh herbs Yogurt parfaits layered with gluten-free granola These feel abundant and satisfying, without ever needing to explain that they’re gluten-free—the best compliment is when guests don’t even think about it. Clarify your guests’ needs early If you’re hosting someone who must strictly avoid gluten, ask a few gentle questions ahead of time. Something like: “I’m planning a fully gluten-free brunch and want to be sure we’re on the same page. Do you avoid oats? Are there any brands you trust or avoid?” This kind of upfront conversation builds trust and prevents last-minute panic when you realize your guest can’t have a certain ingredient. You can also offer to share the menu in advance. Many gluten-free guests are happy to bring a favorite bread or dessert to add to the table, which takes pressure off you and ensures there’s at least one “sure thing” they’re excited about. Make a realistic hosting plan Brunch timing can be tricky because you’re working with a mid-morning or early afternoon start. To keep yourself sane, decide honestly how much energy you have: Low-energy brunch: One homemade main + store-bought helpers (fruit, yogurt, gluten-free granola, pre-washed greens). Medium-energy brunch: Two cooked dishes + one baked treat you prep the day before. High-energy brunch: Multiple mains and sides, a baked item, and a salad—but only if you truly enjoy being in the kitchen. Write down what you’ll cook, what you’ll buy ready-made, and what time everything needs to go into the oven. Treat it like a simple project plan; your future hosting self will thank you. Need Help Staying Organized? Plan meals & shopping Stay on track with ease See Planner 2. Safe Gluten-Free Brunch Menu Ideas & Smart Storage Once you’ve committed to a simple framework, it’s time to plug in actual recipes and decide how you’ll store and serve everything. The goal: maximum flavor, minimal last-minute chaos. Gluten-free brunch mains everyone loves Here are reliable, crowd-pleasing ideas you can adapt with whatever you have on hand: Veggie-loaded frittata: Eggs, cream or milk, cheese, and your favorite vegetables baked in a skillet or baking dish. Naturally gluten-free and reheats beautifully. Shakshuka: Eggs simmered in a spiced tomato and pepper sauce. Serve with gluten-free bread or roasted potatoes for scooping. Breakfast hash: Diced potatoes, onions, peppers, and your choice of sausage or bacon, topped with fried or poached eggs. Yogurt parfait bar: Set out bowls of yogurt, gluten-free granola, chopped nuts, seeds, and fruit for a DIY station.

Blog

“Gluten-Free Lunch Packing Guide for 2026”

2026 Guide Download the Free Guide to Stress-Free Gluten-Free Lunch Packing Gluten-Free Lunch Box Ideas for School, Work & Busy Days Running out of gluten-free lunch box ideas is exhausting, especially when you’re juggling school drop-offs, work meetings, or long study days. This guide walks you through simple, realistic gluten-free lunch strategies, plus easy mix-and-match ideas so you can pack safe, satisfying meals without spending your entire morning in the kitchen. Download Our Free Gluten-Free Starter Guide 7-day meal plan shopping list Tips & 3 beginner-friendly recipes download now Introduction Gluten-free lunches don’t have to be complicated, bland, or repetitive. With the right structure and a few go-to ideas, you can pack boxes that feel fresh and fun while still being safe for celiac disease or gluten sensitivity. The goal of this guide is to help you think in “building blocks” instead of individual recipes so you can create endless combinations from a small list of staples. We’ll cover how to plan ahead without meal-prepping your entire weekend away, smart ways to balance protein, fiber, and fats so lunches actually keep you full, and how to handle cross-contact risks when you’re sharing a kitchen, office fridge, or school table with gluten eaters. You’ll also find real-life ideas for busy mornings, picky eaters, and long days away from a microwave. Whether you’re packing for yourself, a gluten-free kid, or the whole household, these strategies, checklists, and lunch box ideas will help you feel prepared instead of panicked at 7:45 a.m. Let’s turn “What on earth do I pack?” into “I’ve got at least three options ready to go.” “egf-toc-section-2025”> Table of Contents ▾ 1. Building a Balanced Gluten-Free Lunch Box 2. Essential Gluten-Free Lunch Gear & Containers 3. Easy Gluten-Free Lunch Box Ideas (No Reheating Needed) 4. Time-Saving Prep Tips for Busy Weeks 5. Label Reading, Safety & Eating Away from Home 1. Building a Balanced Gluten-Free Lunch Box A satisfying gluten-free lunch box starts with balance. Instead of centering everything around bread or wraps, think in simple categories: protein, complex carbs, colorful produce, and healthy fats. When you include something from each group, you’re much more likely to stay full, energized, and focused through the afternoon. Use this basic gluten-free lunch box formula: 1–2 proteins: grilled chicken, hard-boiled eggs, tuna salad (on gluten-free crackers), hummus, beans, edamame, cheese, Greek-style yogurt, nut or seed butter. 1 complex carb: gluten-free whole-grain crackers, quinoa, brown rice, gluten-free pasta salad, roasted potatoes, or certified gluten-free oats in an overnight oats jar. 2+ fruits or veggies: sliced cucumbers, cherry tomatoes, bell peppers, snap peas, carrot sticks, berries, apple slices, grapes, clementines. 1 healthy fat or “fun” add-on: olives, avocado, guacamole, nuts or seeds, dark chocolate square, trail mix (gluten-free), or a small dip. Once you start thinking this way, it’s easier to mix and match from what you already have in the fridge and pantry. You’re not trying to reinvent the wheel every morning—you’re just plugging different pieces into the same reliable framework. Gluten-Free Staples That Work Well in Lunch Boxes Keeping a few dedicated gluten-free staples on hand makes building lunch boxes much faster. If you can, store gluten-free foods in a separate bin or shelf to avoid accidental crumbs and cross-contact from gluten-containing items. Proteins: rotisserie-style chicken (check labels), frozen gluten-free turkey burgers (cooked and sliced), canned beans, canned tuna or salmon, pre-cooked chicken sausages, tofu cubes or baked tempeh. Carbs: certified gluten-free crackers, rice cakes, gluten-free tortillas, frozen cooked rice, quinoa packs, gluten-free pasta, gluten-free granola. Fruits & veggies: mini cucumbers, baby carrots, pre-washed salad greens, frozen edamame (thawed in the lunch box), apples, clementines, berries, grapes. Extras: individual hummus cups, guacamole cups, shelf-stable nut butters, single-serve olives, gluten-free snack bars (read labels carefully). Sample Balanced Gluten-Free Lunch Box Combos Here are a few mix-and-match ideas using that formula. These work for kids, teens, and adults; just adjust portions and seasonings. Mediterranean snack box: hummus, gluten-free crackers, cucumber & bell pepper sticks, olives, feta cheese cubes, grapes. Deconstructed taco bowl: seasoned ground turkey or black beans, rice or quinoa, shredded lettuce, corn, salsa, shredded cheese, a side of tortilla chips (gluten-free). Protein-packed breakfast-for-lunch: hard-boiled eggs, gluten-free mini pancake or waffle wedges, Greek-style yogurt, berries, and a sprinkle of gluten-free granola. Classic “sandwich” alternative: turkey and cheese roll-ups, rice cakes or crackers, apple slices with peanut or sunflower seed butter, carrot sticks. Use these as a jumping-off point and swap in what your household actually enjoys. The more repeatable your lunch structure is, the less decision fatigue you’ll feel on busy mornings. Need Help Staying Organized? Plan meals & shopping Stay on track with ease See Planner 2. Essential Gluten-Free Lunch Gear & Containers The right containers make gluten-free lunches easier, safer, and much more appealing—especially if you’re trying to avoid crumbs from other people’s food. A dedicated lunch box system also helps prevent cross-contact in shared fridges and lunchrooms because your food stays sealed and separate. What to look for in gluten-free lunch gear: Leak-proof compartments: helpful when you’re packing dips, dressings, or juicy fruits and don’t want everything to mingle. Easy-to-clean design: fewer crevices mean fewer hiding spots for crumbs and easier washing for those with celiac disease who are protecting against trace gluten. Built-in cooling: if you’re packing dairy, meat, eggs, or gluten-free leftovers and don’t have reliable fridge access, an insulated container or built-in ice element keeps things safer. Portion-friendly sections: multiple compartments make it easier to pack balanced meals (and visually appealing ones!) without everything touching. Whether you’re packing lunches for kids or adults, a sturdy, compartmentalized lunch box can turn simple ingredients into something that feels more like a café-style snack board. It’s also easier to see at a glance that you’ve got protein, produce, and carbs covered before you snap the lid on and run out the door. Bentgo Chill Max Lunch Box it’s perfect for anyone who wants cute, organized, Instagram-able gluten-free lunches. The built-in ice pack keeps things fresh, the compartments are perfect

Blog

“Mastering Gluten-Free Snack Boxes: A Comprehensive Guide”

2026 Guide Download the Free Guide to Stress-Free Gluten-Free Snacking Anywhere Gluten-Free Snack Box Ideas for Work, Travel, and Social Events Gluten-free life gets a lot easier when you’re never caught hungry and unprepared. A well-planned gluten-free snack box can save you at the office, in the car, on flights, and at every “we only have chips and cookies” kind of gathering. In this guide, you’ll learn how to build practical, budget-friendly snack boxes that keep you safe from gluten and actually excited to eat. Download Our Free Gluten-Free Starter Guide 7-day meal plan shopping list Tips & 3 beginner-friendly recipes download now Introduction If you’re gluten free, you already know the hardest moments usually aren’t the big meals you can plan ahead for. It’s the in‑between hunger — the meeting that runs long, the delayed flight, the last‑minute movie night — when everyone else is happily snacking and you’re quietly wondering if black coffee counts as dinner. That’s exactly where a gluten-free snack box becomes your secret weapon. Think of a snack box as your portable “just in case” kit: a small stash of safe, satisfying food you can keep at work, in your bag, the car, or your carry‑on. When it’s stocked thoughtfully, it does more than just prevent hanger. It reduces stress, lowers the risk of accidental gluten exposure, and gives you back a sense of control in social situations that can otherwise feel awkward or isolating. This guide walks you through how to build gluten-free snack boxes for real life — workdays, road trips, kids’ activities, social events, and everything in between. You’ll learn what to pack, how to keep it budget-friendly, how to read labels smarter, and how to stay prepared without feeling like you’re lugging a suitcase of food everywhere you go. Table of Contents ▾ 1. Why Gluten-Free Snack Boxes Are a Lifesaver 2. Building a Reliable Gluten-Free Snack Box 3. Snack Box Ideas for Work, Travel, and Social Events 4. Label Reading, Cross-Contact, and Safety Tips 5. How to Keep Your Snack System Simple and Sustainable 1. Why Gluten-Free Snack Boxes Are a Lifesaver Gluten-free snack boxes are about much more than convenience; they’re about peace of mind. When you live gluten free — whether by medical necessity or choice — food is rarely as simple as “just grab something later.” Last‑minute options are usually the least safe ones, and hunger can pressure you into risky decisions. Having a dedicated snack box changes that dynamic completely. Instead of scrambling, you know you have something safe and satisfying available. That sense of backup helps you: Avoid risky food decisions when you’re tired, stressed, or stuck somewhere with poor options. Say yes to more social plans because you’re not worried about what you’ll eat when you get there. Stay energized and focused at work, school, or on the road without relying on vending machines or convenience stores. Reduce food anxiety in situations where everyone else is snacking and you’re used to going without. Snack boxes are especially helpful in three scenarios: Work and school: Meetings run over, lunch breaks disappear, and catered food often isn’t safe. A drawer, locker, or desk snack box means you’re covered no matter what the day throws at you. Travel and commuting: Delays, detours, and long stretches without gluten-free options are common. A travel snack box can turn a stressful trip into a manageable one. Social events: From backyard parties to game nights, snacks are usually gluten-heavy. Coming prepared with your own options lets you participate instead of just watching. The good news? Creating these boxes doesn’t require specialty products only found in fancy health food stores. With a bit of planning, you can build a system that fits your routine, tastes, and budget — and once it’s in place, maintenance becomes simple. Need Help Staying Organized? Plan meals & shopping Stay on track with ease See Planner 2. Building a Reliable Gluten-Free Snack Box A reliable gluten-free snack box has one job: be ready before you’re hungry. That means shelf-stable items, simple organization, and a mix of nutrients so you’re not surviving on sugar alone. You can build your own from scratch, or keep a pre-curated snack box on hand and then personalize it with a few extras you love. When you’re putting together your snack box, aim for three kinds of foods: Protein and healthy fats – These keep you full and help stabilize energy. Think nuts, seeds, nut butters, gluten-free jerky, roasted chickpeas, or single-serve hummus (if you have fridge access). Carb-based snacks – Great for quick energy and pairing with protein. Options include gluten-free crackers, rice cakes, popcorn, granola bars labeled gluten free, or corn chips from trusted brands. Something fun – Because food is supposed to be enjoyable. This might be a favorite gluten-free cookie, chocolate, gummy candy, or a snack-size treat you genuinely look forward to. Next, think about where your snack box will live. The best box is the one you actually remember and use, so design it for specific locations: Desk or locker box: Use a small bin, shoebox, or reusable container. Choose shelf-stable items that can handle room temperature for weeks. Car kit: Focus on heat-resistant snacks if you live in a warm climate — nuts, seeds, some bars, and sturdy packaged snacks often do better than chocolate or frosted items. Grab-and-go pouch: A small zip bag or organizer in your work bag or backpack. Include portioned snacks in small containers or individual packs to cut down on crumbs and mess. Finally, plan a simple rotation system. Once a month, or whenever you do a bigger grocery shop, quickly check your boxes: Move any items approaching their best-by date into your “eat this week” pile. Top up anything low so the box is always “grab and go” ready. Take note of what you didn’t love so you’re not rebuying snacks that just sit there. You don’t need a Pinterest-perfect system; you just need snacks you like, that you trust,

Blog

Navigating Gluten-Free Life with a Nima Sensor: A Practical Guide

2026 Guide Download the Free Guide to Confident Gluten-Free Travel How to Use a Nima Gluten Sensor Test Safely and Confidently (2026 Guide) Curious about using a Nima gluten sensor test to add another layer of confidence to your gluten-free life? This guide walks you through how it works, how to use it safely and realistically, and how to fit it into an overall gluten-free strategy—without depending on gadgets alone. Download Our Free Gluten-Free Starter Guide 7-day meal plan shopping list Tips & 3 beginner-friendly recipes download now Introduction Gluten-free living today is a mix of label reading, asking questions, and sometimes…a little detective work. Tools like the Nima gluten sensor test can feel like a superhero gadget in your pocket, especially when you’re eating out or traveling. But like any tool, it works best when you understand its strengths, its limits, and how it fits into your overall gluten-free routine. This article is your practical, no-drama walkthrough of using a Nima gluten sensor test with confidence. We’ll talk about when it can be helpful, how to get more reliable results, and how to combine it with your existing gluten-free skills—like checking labels, talking to restaurants, and listening to your own body. The goal isn’t to replace your judgment, but to give you one more option when you want extra information. Whether you’re managing celiac disease, non-celiac gluten sensitivity, or simply exploring gluten-free eating, think of this guide as a calm, realistic companion. No scare tactics, no magic promises—just grounded, experience-based tips to help you decide if and how a Nima gluten sensor test fits into your life. Table of Contents ▾ 1. Understanding What the Nima Gluten Sensor Test Can (and Can’t) Do 2. When to Reach for Your Nima Gluten Sensor Test 3. Step-by-Step: How to Use a Nima Gluten Sensor Test 4. Making Sense of Results & Avoiding Common Mistakes 5. Building a Confident, Low-Stress Gluten-Free Routine 1. Understanding What the Nima Gluten Sensor Test Can (and Can’t) Do Before you rely on any testing tool, it helps to be crystal clear on what it’s designed to do—and what’s outside its job description. That way you use it wisely, not blindly. What a Nima gluten sensor test is designed for A Nima gluten sensor test is generally used to check small samples of food for the presence of gluten. You place a pea-sized bite into a single-use capsule, the sensor runs a test, and then it gives you a simple readout indicating whether gluten was detected in that sample. This can be especially attractive if you: Eat at restaurants where cross-contact is possible Travel frequently and try new foods or cuisines Feel anxious about “hidden gluten” in sauces, marinades, or shared fryers Want another data point when you’re unsure about a particular dish Important limitations to keep in mind Even the best tools have limits. Keeping those in mind can save you stress and help you interpret results more realistically. It only tests the bite you put in the capsule. If one part of a dish is contaminated and the bit you tested isn’t, the sensor can’t see that. It doesn’t replace safe kitchen practices. Careful food handling, clear communication, and choosing knowledgeable restaurants are still essential. It’s not a medical device. It doesn’t diagnose anything and it doesn’t predict how your body will react—only whether gluten was detected in that small sample. There’s always a margin of error. No tool is perfect. Results should be one input in your decision-making, not the entire story. How it fits into a bigger gluten-free strategy Think of a Nima gluten sensor test as one layer in your “gluten safety stack,” alongside: Learning how to read ingredient labels confidently Understanding certification symbols and what they mean Having a go-to script for asking questions at restaurants Keeping some trusted, safe snacks on hand when you’re unsure When you approach the tool this way—useful, but not magical—you get the best of both worlds: more information, with less pressure on a single test to protect you from everything. Need Help Staying Organized? Plan meals & shopping Stay on track with ease See Planner 2. When to Reach for Your Nima Gluten Sensor Test Because capsules are single-use, most people don’t test every meal. Instead, they use a Nima gluten sensor test for “high-anxiety” situations—times when information would really change their decision. Helpful scenarios for using a test Eating at a new restaurant. Especially if you’re not familiar with how they handle cross-contact or shared equipment. Traveling internationally. Language barriers and unfamiliar cuisines can make it harder to judge what’s likely to be safe. Trying something highly mixed. Dishes like sauces, soups, marinades, or battered foods can hide gluten in tiny amounts. Family gatherings or potlucks. Well-meaning friends and relatives don’t always understand gluten the way you do. Situations where you may not need to test You don’t have to test everything to be careful. Many people skip testing when: They’re eating foods from trusted gluten-free brands at home They’re at restaurants they know well and have safely eaten at before They’re using single-ingredient basics: plain rice, fresh fruit, steamed veggies, etc. Using your Nima selectively can help balance peace of mind with practicality, cost, and time. Nima gluten sensor test These single-use capsules pair with the Nima Sensor to help users test foods for gluten on the spot. Perfect for travelers, researchers of their own digestive reactions, or anyone who just doesn’t trust that café’s “gluten-free… we think?” answer. A reliable, quick-gluten-detection option that empowers people who want data—not guesswork. → View on Amazon 3. Step-by-Step: How to Use a Nima Gluten Sensor Test The exact procedure will depend on the device’s official instructions, but the overall flow is similar across tests that use single-use capsules. Always follow the directions that come with your product; use the steps below as a general framework to stay organized and calm. 1. Prepare your testing spot Choose a clean, stable surface away from spills and

Blog

Navigating Gluten-Free Baking: Your Essential Guide

2026 Guide Download the Free Guide to Fail-Proof Gluten-Free Baking Every Time The Best Gluten-Free Flour for Baking: A Practical Home Baker’s Guide Choosing the best gluten-free flour for baking can feel overwhelming, but it doesn’t have to be. This guide breaks down how gluten-free flours behave, which blends are worth your money, and how to get soft cookies, fluffy muffins, and tender cakes without the guesswork. Download Our Free Gluten-Free Starter Guide 7-day meal plan shopping list Tips & 3 beginner-friendly recipes download now Introduction If you’ve ever pulled a pan of gluten-free cookies out of the oven only to find dry crumbs or sad, flat puddles, you are absolutely not alone. Most home bakers discover very quickly that you can’t just swap wheat flour for “any” gluten-free flour and hope for the best. The flour blend you choose matters just as much as the recipe. The good news: once you understand a few basics about gluten-free flours, you can bake with confidence. You’ll know which blends are best for fluffy cakes, which ones shine in cookies, and how to avoid the most common pitfalls like gumminess, grittiness, and collapse. This article focuses on real-world, home-kitchen results—not lab perfection—so you can get reliable bakes on a busy weeknight. In this guide, we’ll walk through how gluten-free flour works, what to look for on a label, how to choose the best gluten-free flour for baking your favorite treats, and how to adjust your recipes for consistent, repeatable success. By the end, you’ll have a simple decision framework you can use every time you reach for a bag of flour. Table of Contents ▾ 1. Understanding Gluten-Free Flours 2. The Best All-Purpose Gluten-Free Flour for Everyday Baking 3. How to Choose the Right Gluten-Free Flour for Each Recipe 4. Simple Tweaks for Perfect Gluten-Free Bakes 5. Frequently Asked Questions About Gluten-Free Flour 1. Understanding Gluten-Free Flours If you grew up baking with wheat flour, gluten-free baking can feel like learning a new language. In wheat-based baking, one bag of all-purpose flour does almost everything. In gluten-free baking, you’re working with blends of different flours and starches that each bring their own personality to the batter. Gluten is what gives traditional dough its stretch, chew, and structure. Without it, your baked goods need support from a combination of starches, whole-grain flours, and binders like xanthan gum or psyllium husk. When these are balanced well in a blend, you can get bakes that taste and feel surprisingly close to what you remember from wheat flour. Most store-bought gluten-free “all-purpose” or “1:1” flours are actually blends. You’ll often see a mix like rice flour, potato starch, tapioca starch, and sometimes sorghum or millet flour. Each component does a job: Rice flour adds bulk and a neutral flavor. Starches (tapioca, potato, corn) add lightness and tenderness. Whole-grain flours (sorghum, millet, oat) add flavor, color, and structure. Binders (xanthan gum, guar gum) help mimic the elasticity of gluten. The most important thing to know: no two gluten-free blends behave exactly the same. That’s why you might see wildly different results if you swap one brand for another in the same recipe. Some blends are starch-heavy and great for very tender cakes but too soft for bread. Others have more whole grains and can make cookies a bit firmer or more “hearty.” When you’re choosing the best gluten-free flour for baking, think about three things: texture, flavor, and versatility. For everyday home baking—pancakes, muffins, cookies, quick breads—a well-balanced, neutral-flavored 1:1 blend is usually the easiest and most reliable option. You can always layer in specialty flours later as you become more confident. You don’t need a separate flour for every single recipe. In fact, switching brands constantly can make your results unpredictable. For most bakers, choosing one reliable, well-tested blend as your “house flour” is the simplest path to consistent success. Need Help Staying Organized? Plan meals & shopping Stay on track with ease See Planner 2. The Best All-Purpose Gluten-Free Flour for Everyday Baking When people ask about the best gluten-free flour for baking, what they usually mean is: “Which flour can I keep in my pantry and use for almost everything without thinking too hard?” That’s where a well-formulated 1:1 baking blend really shines. The goal is simple swaps: you want to be able to take a favorite family recipe and have it work with minimal changes. A good 1:1 blend should be: Consistent – so your muffins don’t turn out perfect one week and dry the next. Well-balanced – not overly starchy, not too heavy or gritty. Versatile – able to handle cookies, quick breads, pancakes, and cakes reasonably well. Widely used – so you can easily find recipes tested specifically with that flour. Once you choose a go-to flour blend, stick with it for a while. Use it for multiple recipes and pay attention to patterns. Are your cookies spreading too much? Are your cakes dense in the center? Because the blend is consistent, you can make small tweaks—like chilling dough, adding an extra tablespoon of flour, or slightly reducing liquid—and quickly dial in what works in your kitchen. Another benefit of choosing a single, reliable gluten-free flour for baking is cost efficiency. Instead of buying half a dozen specialty flours you’ll use twice, you invest in one that carries most of the workload. Over time, if you want to experiment with bread flour blends or whole-grain mixes, you’ll be starting from a solid, trustworthy baseline. Bob’s Red Mill Gluten Free 1 to 1 Baking Flour This is the gold-standard gluten-free all-purpose flour. It behaves beautifully in pancakes, muffins, cookies, quick breads — and it’s the ideal flour to recommend in ANY practical baking guide. Reliable, consistent, and approved by thousands of gluten-free home bakers. Perfect for articles about technique, substitutions, and baking success. → View on Amazon 3. How to Choose the Right Gluten-Free Flour for Each Recipe Even with a trusted 1:1 blend in your pantry, it helps to know

Blog

Mastering Stress-Free Gluten-Free Meal Prep

2026 Guide Download the Free Guide to Stress-Free Gluten-Free Hosting Gluten-Free Meal Prep & Storage Tips for Busy Home Cooks If you’re gluten-free and juggling work, family, and real life, meal prep can feel less like a TikTok trend and more like survival mode. The good news? With a few smart systems and the right storage setup, you can make safe, delicious gluten-free food once and enjoy it all week—without worrying about cross-contact or soggy leftovers. Download Our Free Gluten-Free Starter Guide 7-day meal plan shopping list Tips & 3 beginner-friendly recipes download now Introduction Meal prep is one of the easiest ways to make a gluten-free lifestyle feel manageable instead of overwhelming. A little planning on the front end means fewer last‑minute “What can I eat?” panics, less risk of grabbing something questionable, and more calm, confident gluten-free living during your busy week. But gluten-free meal prep isn’t exactly the same as conventional meal prep. You’re thinking not only about taste and convenience, but also about cross-contact, safe storage, and how to keep your food fresh without relying on a ton of processed products. The containers you use, where you store things, and even how you label them can all impact how safe and enjoyable your meals feel. This guide walks you through gluten-free meal prep and storage from start to finish: how to plan, what to prep, how to organize your fridge and freezer, and how to store everything so it stays fresh, tasty, and safely gluten-free. Consider this your go-to playbook for busy nights, work lunches, kid snacks, and those “I’m tired but still have to feed myself” evenings. Table of Contents ▾ 1. Planning Gluten-Free Meal Prep That Actually Works 2. Safe Storage Basics for a Gluten-Free Kitchen 3. Fridge, Freezer & Pantry: What to Prep and How Long It Lasts 4. Gluten-Free Meal Prep Ideas for Busy Weeks 5. Make Meal Prep a Sustainable Habit 1. Planning Gluten-Free Meal Prep That Actually Works The secret to stress-free gluten-free meal prep is planning realistically. Not Pinterest-perfect, but “this fits my life, my schedule, and my energy.” Start small, stay consistent, and focus on meals that remove stress from your week. Start with your week, not your recipes Before you even think about recipes, look at your schedule: Late work nights? Plan easy reheat meals: soups, stews, casseroles, and sheet-pan dinners. Lots of driving or kids’ activities? Focus on grab-and-go snacks and portable lunches. Weekend brunch lover? Prep gluten-free pancakes, waffles, or frittatas ahead. Choose 2–3 “anchor meals” that will make the biggest difference. For most gluten-free home cooks, that’s usually: One big-batch dinner (chili, curry, or a baked pasta made with GF noodles). A set of lunch components (grains, roasted veggies, a protein, and a sauce). At least one breakfast or snack option that’s truly ready to eat. Build around naturally gluten-free ingredients To keep prep simpler (and usually cheaper), lean on whole foods that are naturally gluten-free: Proteins: chicken, turkey, eggs, tofu, beans, lentils, ground beef. Carbs: rice, quinoa, potatoes, sweet potatoes, gluten-free oats, polenta. Veggies & fruit: fresh, frozen, or roasted—these add color, fiber, and flavor. Flavor boosters: gluten-free broth, tamari, herbs, spices, citrus, and safe condiments. Read labels carefully on everything packaged, especially broths, sauces, marinades, spice blends, and processed meats, which can sometimes hide gluten. Create a quick prep game plan Once you’ve chosen your meals, make a simple plan for your actual prep session: Start with what takes longest (roasted veggies, grains, slow-cooker meals). Layer in hands-off cooking (rice in a rice cooker, beans in the Instant Pot) while you chop. Finish with assemble-only items like salads, snack boxes, and overnight oats. Write your plan somewhere visible or add it to your phone notes: it keeps you focused and makes prep feel less chaotic and more like a calm system. Need Help Staying Organized? Plan meals & shopping Stay on track with ease See Planner 2. Safe Storage Basics for a Gluten-Free Kitchen Safe storage is just as important as safe ingredients. In a shared or newly gluten-free kitchen, you’re not only storing food—you’re protecting it from accidental gluten exposure and keeping it fresh so your prep is actually worth the effort. Prevent cross-contact in the fridge and pantry If you share your kitchen with gluten-eaters, think in terms of clear “zones” and physical barriers: Designate gluten-free shelves in the fridge and pantry, especially for ready-to-eat foods. Store gluten-free items above gluten-containing ones so crumbs can’t fall into your food. Use closed containers for your gluten-free bakes, leftovers, and snacks—no open plates near regular bread. Label containers with “GF” so no one accidentally dips a gluten-y spoon into your safe food. Pick containers that make your life easier When it comes to gluten-free storage, a few container features really help: Leakproof lids to keep sauces and soups contained and away from crumbs. Clear sides so you can see what’s inside and avoid “mystery leftovers” that go to waste. Freezer-safe materials if you like to batch-cook gluten-free meals. Easy to clean so no lingering smells or residue between uses. Having a set of dedicated gluten-free containers can be a game changer, especially in mixed households. Some people even label them or choose a specific color so everyone knows they’re for gluten-free food only. Label everything (your future self will thank you) Gluten-free meal prep goes sideways when you forget what’s what. Simple labeling helps you stay organized and safe: Use masking tape or dissolvable labels for the name of the dish and the date. Add cooking or reheating notes if needed (for example: “Bake at 375°F for 20 minutes”). For shared kitchens, note “GF” clearly so others treat it as off-limits for gluten-y utensils. Premium Silicone Reusable Food Storage Bags These are the “I have my life together” bags. Perfect for packing gluten-free snacks, leftovers from brunch, veggie sticks for road trips, or even freezer prep for busy weeks. They’re reusable, dishwasher-safe, plastic-free, and look aesthetically pleasing in your fridge and

Blog

“Stress-Free Gluten-Free Lunch Box Guide for Adults”

2026 Guide Download Your Free Guide to Stress-Free Gluten-Free Lunches Gluten-Free Lunch Box Ideas for Adults: Easy, Fresh & Actually Satisfying Gluten-free lunches don’t have to be boring salads or plain rice cakes eaten at your desk. With a little planning and the right lunch box setup, you can pack colorful, satisfying, and budget-friendly gluten-free lunches that you’ll actually look forward to eating. This guide walks you through simple gluten-free lunch box ideas for adults, plus smart packing tips to keep everything safe, fresh, and delicious. Download Our Free Gluten-Free Starter Guide 7-day meal plan shopping list Tips & 3 beginner-friendly recipes download now Introduction Figuring out what to eat for lunch is hard enough; add “gluten-free” to the mix and it can feel like a full-time job. If you’ve ever opened your lunch bag only to find wilted salad, soggy crackers, or a meal that doesn’t actually keep you full, you’re not alone. Many adults going gluten-free struggle to find lunch box ideas that are quick, portable, and genuinely satisfying. The good news: with a bit of structure and the right containers, gluten-free lunch boxes can be as fun and varied as any café menu—without the mystery ingredients or last-minute panic. This guide focuses on practical, repeatable ideas you can mix and match all week long, whether you’re packing for the office, remote co-working days, travel, or long errands. We’ll walk through how to build a balanced gluten-free lunch, give you plug-and-play lunch box combinations, show you how to use bento-style boxes to stay organized, and share make-ahead strategies that work even on your busiest mornings. Think of this as your go-to resource whenever you’re staring into the fridge wondering, “What on earth do I pack tomorrow?” Table of Contents ▾ 1. Building a Balanced Gluten-Free Lunch Box 2. Bento-Style Gluten-Free Lunch Ideas for Adults 3. Make-Ahead Gluten-Free Lunch Prep (So Weekdays Stay Easy) 4. Safe Packing Tips for Gluten-Free Lunches 5. Sample Gluten-Free Lunch Box Combinations 1. Building a Balanced Gluten-Free Lunch Box A great gluten-free lunch box starts with balance. When your meal has protein, healthy fats, fiber-rich carbs, and color from fruits and veggies, you stay fuller longer and avoid that 3 p.m. energy crash. One simple way to think about it is this: choose a protein, add a produce “rainbow,” then round it out with a gluten-free carb and something fun. Focus on Naturally Gluten-Free Proteins Protein is the anchor of a satisfying lunch. Many protein sources are naturally gluten-free, which keeps things simple: Grilled or roasted chicken, turkey, or beef slices Hard-boiled eggs or egg salad (made with gluten-free mayo) Canned tuna or salmon mixed with olive oil, lemon, and herbs Cheese cubes or slices Hummus, bean dips, or lentil salads Tofu, tempeh, or edamame Leftover gluten-free meatballs or burger patties (no bun) When using deli meats, look for clearly labeled gluten-free options and avoid anything with added “wheat,” “modified food starch” (unless specified gluten-free), or “malt.” Add Fruits and Veggies for Fiber and Color Produce keeps your lunch box fresh, crunchy, and more interesting. Aim for at least two different colors. Easy packable options include: Baby carrots, cucumber rounds, and bell pepper strips Cherry tomatoes or snap peas Apple slices (tossed in lemon to prevent browning), grapes, or berries Mandarin oranges, kiwi slices, or melon cubes Pre-shredded coleslaw mix tossed with a simple vinaigrette Raw veggies pair especially well with dips like hummus, guacamole, or yogurt-based ranch (check that any seasoning packets are gluten-free). Choose Satisfying Gluten-Free Carbs Carbs help with energy and staying power, especially for long afternoons. Instead of relying on random snacks, be intentional: Cooked gluten-free grains: quinoa, rice, buckwheat, or millet Gluten-free crackers or rice cakes (check labels carefully) Gluten-free tortillas or wraps (great for pinwheels or roll-ups) Leftover gluten-free pasta salad Baked potatoes or sweet potatoes (delicious cold with toppings) If you’re newly gluten-free, it helps to keep one or two trusted carb options on rotation so you’re not constantly decoding labels. Add Healthy Fats and a Little Fun Healthy fats keep you full and make everything taste better. They’re also easy to pack: Single-serve guacamole or hummus cups Nut or seed butter packets (if your workplace allows nuts) Olives or a small portion of nuts Cheese, avocado slices, or a drizzle of olive oil on salads or grain bowls Then, if you’d like, add a small “treat” that feels intentional rather than random—like a square of dark chocolate, a homemade gluten-free cookie, or a few gluten-free pretzels. Need Help Staying Organized? Plan meals & shopping Stay on track with ease See Planner 2. Bento-Style Gluten-Free Lunch Ideas for Adults Bento-style lunch boxes are perfect for gluten-free eating because the compartments naturally separate foods and help prevent accidental crumb cross-contact. They also make your lunch look instantly more appealing, which actually matters when you’re trying to stick with new habits. Think of each compartment as a “slot” to fill: one for protein, one for veggies, one for carbs, one for dips or toppings, and one for something small and snacky. Here are some adult-friendly gluten-free bento ideas you can rotate through the week. Mediterranean Snack Box Grilled chicken strips or falafel (made with gluten-free ingredients) Cucumber, cherry tomatoes, and bell pepper strips Gluten-free crackers or a small portion of cooked quinoa Hummus and a few olives Grapes or orange slices for something sweet Sushi-Inspired Bowl (No Rolling Required) Cooked rice or quinoa Cooked shrimp, crab-style seafood labeled gluten-free, or tofu Cucumber, carrot matchsticks, and avocado Gluten-free tamari in a leak-proof mini container Seaweed snacks on the side (check they’re gluten-free) This gives you all the sushi vibes without needing to roll anything at 7 a.m. Adult “Lunchable” Protein Box Gluten-free deli turkey or chicken, or leftover roasted meat Cheese slices or cubes Gluten-free crackers Baby carrots and snap peas with ranch or hummus Apple slices or a small bunch of grapes It’s simple, customizable, and easy to throw together from fridge staples. Hearty Salad Box (That Won’t

Blog

“Stress-Free Gluten-Free Travel Snack Guide 2026”

2026 Guide Download the Free Guide to Stress‑Free Gluten‑Free Travel Snacks Gluten-Free Travel Snacks: Easy Ideas for Airports, Road Trips & Busy Days Trying to travel gluten free without going hungry (or spending $30 on sad airport nuts) is…a lot. This guide walks you through simple, packable gluten-free travel snack ideas, how to plan ahead, and what to look for on the road so you can actually enjoy the trip instead of stress-scanning every snack shelf. Download Our Free Gluten-Free Starter Guide 7-day meal plan shopping list Tips & 3 beginner-friendly recipes download now Introduction Traveling or commuting while gluten free adds a layer of logistics most people never have to think about. You’re not just packing a bag; you’re packing Plan A, B, and C so you’re not stuck hungry in an airport, on a highway, or at a friend’s house with nothing safe to eat. The good news: with a little strategy and the right gluten-free snacks, life on the go can feel far less stressful — and a lot more delicious. In this guide, we’ll walk through practical gluten-free travel snack ideas for planes, road trips, workdays, and long errands. You’ll learn how to build a balanced “snack kit,” what to check on labels, and how to prevent cross-contact when you’re snacking in the wild. Think of this as your on-the-go survival guide for gluten-free living, whether you’re traveling across the country or just sprinting between meetings. Nothing here is meant as medical advice, just lived-experience strategies and gluten-free know‑how to help you feel more prepared. Use what fits your lifestyle, adjust for your own needs and tolerances, and remember: you deserve more than just plain salad and air-popped rice cakes. Let’s build a snack plan that actually works. Table of Contents ▾ 1. Planning Gluten-Free Snacks Before You Travel 2. Easy Gluten-Free Snacks for Planes, Trains & Road Trips 3. Building a Portable Gluten-Free Snack Kit 4. How to Read Labels & Avoid Cross-Contact on the Go 5. Sample Gluten-Free Snack Lists for Different Trips 1. Planning Gluten-Free Snacks Before You Travel Strong gluten-free travel starts before you ever zip your suitcase. When you plan snacks ahead, you remove a lot of stress, last‑minute spending, and “I guess I’ll just eat later” moments. Think of planning in three layers: what you’ll definitely eat, what you might need, and what you keep as true emergency backup. First, look at your itinerary. How many hours will you be in transit door‑to‑door? Are you crossing time zones? Do you have connections or layovers where food options may be limited? For most trips, planning for at least one full extra meal’s worth of snacks beyond what you think you’ll need is a smart buffer. Delays, traffic, or closed airport restaurants are a lot less stressful when you know your bag is full of safe options. Next, consider your routine. Are you someone who feels best with protein-heavy snacks, or do you graze more frequently on lighter things? Try to mimic your usual rhythm as much as possible. For example, pack: Protein options: nuts or seeds (if tolerated), pre-portioned nut butter, jerky labeled gluten free, roasted chickpeas, hard-boiled eggs you eat early in the trip. Carb options: gluten-free crackers, rice cakes, individual oatmeal cups, fruit, or small baked goods from home. Fun extras: a chocolate bar labeled gluten free, gummies, popcorn, or your favorite “comfort snack” so you don’t feel deprived while everyone else is munching. Finally, think about storage. Do you need snacks that can survive in a hot car? Do you have access to a fridge on arrival? Using a small insulated bag with a reusable ice pack expands your options to things like cheese sticks, yogurt, and cut veggies. Pack items in clear, small containers or bags so you can see what you have at a glance and keep gluten-free foods sealed when you’re around shared spaces or crumbs. Need Help Staying Organized? Plan meals & shopping Stay on track with ease See Planner 2. Easy Gluten-Free Snacks for Planes, Trains & Road Trips When you’re actually in motion — boarding a plane, piling into a car, or catching a train — convenience matters. You want snacks that are easy to open, not super messy, and clearly gluten free so you’re not second‑guessing every bite. Individually wrapped or portioned snacks are especially helpful for long days, shared travel situations, or when you’re hopping between events and don’t know what food will be available. For air travel, aim for compact, non‑liquid, non‑crumbly snacks that can survive being bumped around in a backpack. Think gluten-free bars, trail mixes or nuts, dried fruit, sturdy crackers, and shelf‑stable items like jerky labeled gluten free. You can also bring an empty water bottle to fill after security and pair it with electrolyte packets that are gluten free for long flights. On road trips, you have a bit more flexibility. A small cooler or insulated bag can hold gluten-free yogurt, cheese sticks, hummus cups, and fresh fruit or veggies. Pair them with gluten-free crackers or rice cakes, and you’ve basically built a mini snack board in the car. For gas station stops, your safest bets tend to be packaged items that clearly say gluten free on the label rather than open bins or shared coffee shop pastries. If you’re traveling with others who eat gluten, having your snacks in their own bin or bag helps protect them from stray crumbs or shared hands. Communicate clearly — “These are my gluten-free snacks; please don’t mix them with the group food” — so you’re not stuck wondering if someone grabbed your crackers right after handling a regular sandwich. It’s your body and your health; you’re allowed to set those boundaries. Snack BOX Gluten Free Healthy Care Package  This box is basically “emergency gluten-free social survival” in one package. It’s packed with individually wrapped snacks you can throw into your bag, keep at the office, bring to movie nights, or stash in your car so you

Scroll to Top

We See You Googling
‘Easy Gluten-Free Dinner’ Again​

Save your search history some stress. Grab our FREE 7-Day Beginner's Guide and finally have a plan you can actually cook